



How to Mix Plant Protein Smoothly: 2026 Guide
Table of Contents
- Why Plant Protein Gets Chalky (And How to Fix It)
- What You'll Need for a Smooth Mix
- Step 1: Choose the Best Liquid for Plant Protein Shakes
- Step 2: Master the Liquid-to-Powder Ratio
- Step 3: The Right Order of Operations
- Blender vs Shaker Bottle for Protein: Which Wins?
- Step 4: Techniques for Specific Protein Types
- How to Make Protein Shakes Taste Better
- Common Mistakes to Avoid
- Conclusion: Your Smooth Shake Routine
- Frequently Asked Questions
Last Updated: September 4, 2026
Why Plant Protein Gets Chalky (And How to Fix It)
The secret to learning how to mix plant protein smoothly is understanding that the problem starts before the powder ever touches water. Most gritty shakes are the result of poor solubility, weak emulsification, and a rushed blending technique, not a bad product. Plant proteins like pea and hemp simply do not dissolve the way whey does, so they require a different approach entirely.
At VitaFaze, we formulate our vegan shakes with this reality in mind, but the mixing method still matters. A common mistake is dumping powder and liquid together and shaking once. That leaves dry clumps clinging to the sides of the glass, which is the primary cause of that unpleasant, chalky texture. The fix lies in mastering a few basic principles of liquid chemistry and blending order.
Below, we'll walk through the exact steps to achieve a creamy, smooth consistency every time. The techniques we cover will work with any powder you have on hand.
What You'll Need for a Smooth Mix
A smooth plant protein shake is the result of the right equipment, the correct liquid temperature, and a quality powder. Before you start, gather your essentials to make the process effortless.
- A high-speed blender or a quality shaker bottle with a mixing ball or whisk. A blender is always the superior choice for the smoothest results.
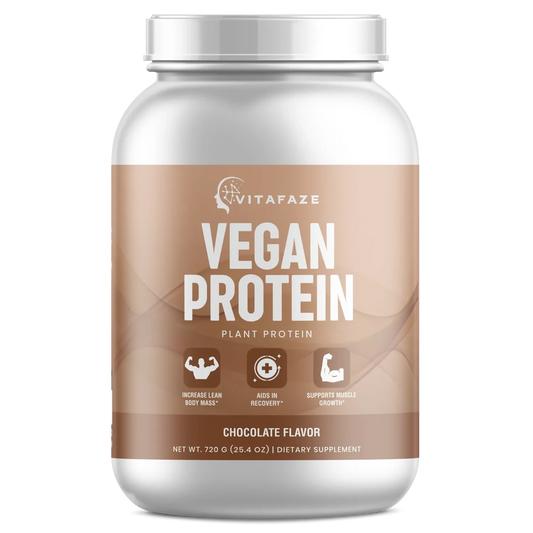
- Your plant protein powder. Look for a product with a fine texture and a clean ingredient list, like our Vegan Protein Chocolate Shake, which provides 22 grams of complete protein per serving.
- A liquid base. Unsweetened almond milk, oat milk, or coconut water are all excellent options that add their own flavor and texture.
- Ice or frozen fruit. Cold ingredients not only improve the taste but also help to control foam and create a thicker, more indulgent shake.
- A thickener (optional). A quarter of a frozen banana, a tablespoon of chia seeds, or a spoonful of nut butter can dramatically improve the mouthfeel.
Step 1: Choose the Best Liquid for Plant Protein Shakes
The best liquid for plant protein shakes is unsweetened almond milk because it is low in calories, neutral in flavor, and blends seamlessly with most protein powders. Water works in a pinch, but it does nothing to mask the earthy notes of pea or hemp protein. Milk alternatives add a creamy texture that water simply cannot replicate.

Dairy milk is also an option for those who consume it, offering additional protein and a rich consistency. However, for a vegan nutrition plan, oat milk provides a naturally sweet flavor and a thicker body, while soy milk adds a complementary protein boost. The key is to avoid liquids that are too warm, as heat can cause plant proteins to denature and clump together faster.

Step 2: Master the Liquid-to-Powder Ratio
The ideal liquid-to-powder ratio is approximately 8 to 12 ounces of liquid for every standard scoop of protein powder (about 25-30 grams) (peer-reviewed research). This ratio is the single most important factor in determining whether your shake turns out smooth or pasty. Too little liquid creates a thick sludge that is difficult to mix, while too much results in a watery, unsatisfying drink.
Start with the lower end of the range (8 ounces) and add more liquid only if the shake is too thick for your taste. The consistency should be similar to a thick milkshake, not a thin juice. Remember that adding ice or frozen fruit will also contribute volume and water content as they blend, so adjust your liquid amount accordingly.
Step 3: The Right Order of Operations
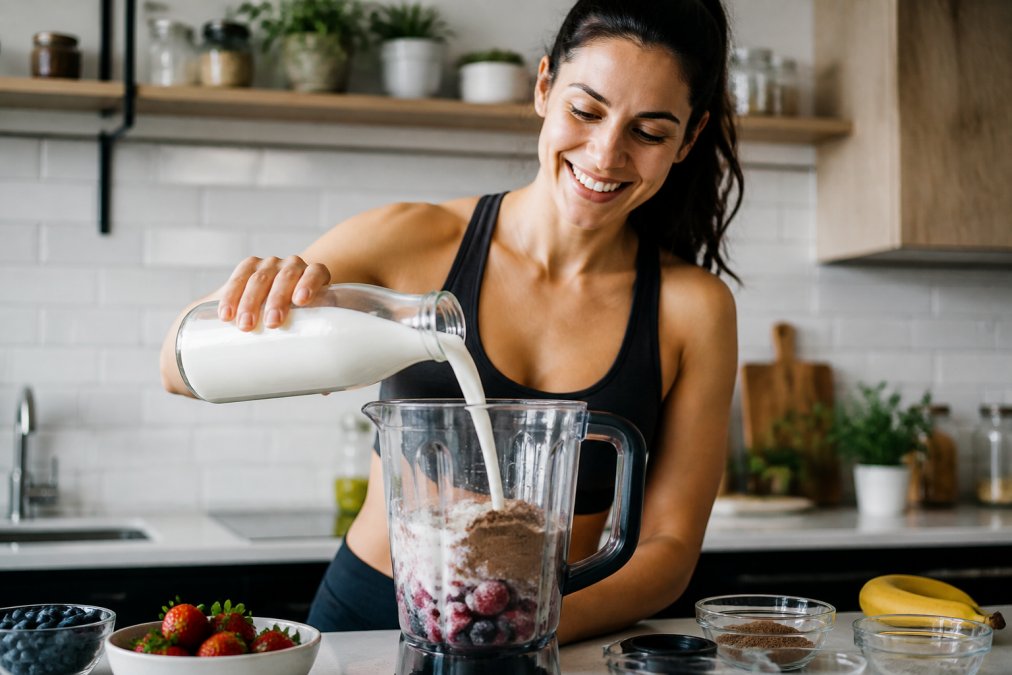
The correct order is liquid first, then powder, then any thickeners or frozen ingredients. This sequence prevents the powder from caking onto the bottom of the blender jar or shaker bottle, which is a primary cause of clumping. By adding the liquid first, you create a vortex that pulls the powder down into the center for even dispersion.
If you are using a blender, follow these steps:
- Pour your liquid base into the blender.
- Add your plant protein powder.
- Add your thickeners, like nut butter or chia seeds.
- Add your ice or frozen fruit last.
- Blend on low for 10 seconds to incorporate the powder, then increase to high for 30-45 seconds.
This two-stage blending technique is crucial. Starting slow allows the powder to hydrate and begin dissolving, while the high-speed finish ensures a silky-smooth consistency without leaving any gritty residue.
Blender vs Shaker Bottle for Protein: Which Wins?
A high-speed blender delivers the silkiest texture, but you can get a lump-free shake from a shaker bottle if you use the right technique and a few simple hacks. The choice isn't just about convenience versus texture; it's about understanding the physical limits of each tool and working around them.
The High-Speed Blender: The Gold Standard
A blender with at least 700 watts of power creates a vortex that pulls ingredients down into the blades, physically shearing apart protein clumps (the FDA). This mechanical action is what produces the airy, mousse-like consistency that's hard to replicate by hand. For the smoothest results, always use the two-stage blending method: start on low for 10 seconds to hydrate the powder, then ramp up to high for 30-45 seconds. This prevents the powder from forming a dry cake on the bottom of the jar.
The key hack for blender users: Add your liquid, then your powder, then any thickeners (like nut butter or chia seeds), and finally your ice or frozen fruit. This order ensures the powder is suspended in liquid before the heavy, frozen ingredients weigh it down.
The Shaker Bottle: Making It Work Without a Machine
If you don't have a blender, a shaker bottle with a wire whisk ball or a stainless steel blender ball is your best friend. However, you must adjust your expectations and your technique. A shaker relies on agitation, not shearing force, so it takes longer and requires a specific sequence to avoid clumps.
The 3-Step Shaker Method for a Lump-Free Shake:
- Start with cold liquid. Fill your shaker with 8-10 ounces of cold water or plant milk. Cold liquid slows down the hydration process, giving you more time to disperse the powder before it starts to clump.
- Add the powder, then shake vigorously for 30 seconds. Don't just flip the bottle; use a full range of motion, up, down, and side-to-side, to ensure the ball moves through the entire volume of liquid.
- Let it rest, then shake again. This is the most critical step that most people skip. Let the shake sit for 2-3 minutes. This rest period allows the protein particles to fully hydrate and any foam to rise. After resting, shake again for 15 seconds. You'll notice the texture is noticeably smoother and thicker.
The No-Equipment Fallback: The Fork-and-Jar Technique
For those who are traveling or forgot their shaker, you can still achieve a decent mix. Put your liquid in a jar with a tight-fitting lid, add the powder, and use a fork to vigorously stir for 60 seconds. It won't be perfect, but it will break up most of the major clumps. The key is to add the powder slowly while stirring, rather than dumping it all in at once.
When to Skip the Shaker Altogether
If you're using a gritty protein like hemp or a high-fiber blend, a shaker bottle will never produce a smooth result. The fiber particles are simply too large to be broken down by agitation. In these cases, a blender is non-negotiable. Similarly, if you're adding frozen fruit, oats, or ice, you need a blender to incorporate those ingredients properly.
| Feature | High-Speed Blender | Shaker Bottle |
|---|---|---|
| Texture | Silky, creamy, smooth | Can be slightly gritty, but acceptable with the rest method |
| Convenience | Requires cleaning | Portable, quick |
| Best For | Thick smoothies, frozen fruit, hemp or high-fiber proteins | Post-workout convenience, pea or soy isolates |
| Blending Time | 30-45 seconds | 45-60 seconds with rest period |
| Key Hack | Liquid first, then powder, then frozen ingredients | Cold liquid, 30-sec shake, 2-min rest, 15-sec shake |
Step 4: Techniques for Specific Protein Types
Not all plant proteins are created equal. Their solubility, particle size, and fiber content vary dramatically, which means the 'one-size-fits-all' mixing approach is the primary reason your shake turns out chalky. Understanding the specific characteristics of the protein you're using is the single most effective way to master how to mix plant protein smoothly.
Pea Protein Isolate: The Clumping Champion
Pea protein isolate is the most common plant protein on the market because it's hypoallergenic and has a complete amino acid profile. However, its fine, dense particle size makes it prone to clumping. The particles are so small that they can form a dry paste when they hit water if not dispersed quickly.
The winning technique: Always use a blender with cold liquid. The cold temperature slows down the hydration process, giving the blades more time to separate the particles before they bind together. If you're using a shaker bottle, the rest method is non-negotiable. Add your liquid, add the powder, shake for 30 seconds, let it sit for 3 minutes, then shake again. This allows the dense particles to fully hydrate.
Hemp Protein: The Gritty Fiber Bomb
Hemp protein is a nutritional powerhouse, packed with omega-3s and fiber, but that fiber is exactly what makes it gritty. Hemp protein is essentially ground-up hemp seeds, and the fibrous hull doesn't dissolve in liquid. No amount of shaking will break it down.
The winning technique: A high-speed blender is mandatory for hemp protein. Blend it for a full 60 seconds on high, not the standard 30-45 seconds. The extra time allows the blades to pulverize the fiber particles into a finer, less noticeable texture. For best results, combine hemp protein with a smoother protein like pea or soy in a 1:2 ratio. This dilutes the gritty texture while still giving you the nutritional benefits of hemp.
Brown Rice Protein: The Powdery Problem
Brown rice protein is known for its light, powdery texture that can make a shake taste thin and dusty. It also has a tendency to separate and settle at the bottom of the glass if not properly emulsified.
The winning technique: Use a liquid with a higher fat content, like oat milk or full-fat coconut milk. The fats act as an emulsifier, helping to suspend the rice protein particles in the liquid and creating a richer mouthfeel. Adding a thickener like a quarter of a frozen banana or a tablespoon of nut butter also helps to give the shake more body, masking the powdery texture.
Soy Protein Isolate: The Foam Factory
Soy protein isolate is the most soluble of the plant proteins, meaning it dissolves easily in liquid (PubMed). This makes it the best choice for shaker bottles. However, it has a notorious downside: it produces a massive amount of foam. This is due to the presence of saponins, natural compounds that create a soap-like froth when agitated.
The winning technique: To minimize foam, don't shake it, stir it. Use a spoon or a whisk to gently mix the powder into your liquid. If you do use a shaker bottle, shake it gently rather than vigorously. After mixing, let the shake sit for 3-5 minutes. This allows the foam to collapse and the liquid to settle. You can also add a single ice cube to the shaker; the cold temperature helps to suppress foam formation.
Pumpkin Seed Protein: The Middle Ground
Pumpkin seed protein is less common but growing in popularity. It has a slightly gritty texture, similar to hemp but less severe. It has a strong, nutty flavor that pairs well with chocolate or cinnamon.
The winning technique: Pumpkin seed protein responds well to the blender method. It also benefits from being blended with a frozen banana or avocado, which adds a creamy texture that masks its natural grittiness.
How to Make Protein Shakes Taste Better
The best way to make protein shakes taste better is to mask the inherent bitterness of plant protein with natural sweetness and healthy fats. A pinch of sea salt can also work wonders, as it suppresses bitterness and enhances other flavors. But the real game-changer is using frozen fruit.
Berries, mango, and pineapple add natural sweetness and fiber content. A half of a frozen avocado adds a luxurious, creamy texture and healthy monounsaturated fats without overpowering the flavor. A spoonful of almond butter or a few drops of vanilla extract can also transform a bland shake into a treat. For a post-workout recovery boost, consider adding a handful of spinach; it is virtually tasteless when blended and adds nutritional density.
Common Mistakes to Avoid
Several common mistakes can sabotage your smooth shake, most of which stem from rushing the process. One of the most frequent errors is adding the powder on top of frozen ingredients, which prevents it from reaching the blender blades. Another is using a warm liquid, which encourages clumping.
- Adding powder to a dry blender: Always put liquid in first to create a base.
- Over-blending: Blending for too long can heat the shake and break down the protein structure, leading to a thin, foamy texture.
- Skipping the rest period: Letting the shake sit for a few minutes after blending allows air bubbles to escape and the consistency to thicken.
- Using old powder: Protein powder that has been exposed to moisture can harden and become impossible to mix smoothly.
For those concerned about digestibility and anti-bloating tips, blending your shake thoroughly is key. Properly hydrating the protein powder makes it easier for your body to break down, reducing the chance of gastrointestinal discomfort.
Conclusion: Your Smooth Shake Routine
Mastering the art of mixing plant protein is about respecting the ingredient and using the right technique. By choosing a quality powder, managing your liquid-to-powder ratio, and blending in the correct order, you can enjoy a creamy, delicious shake that supports your training goals without the chalky aftertaste.
The challenge is consistency. It takes a few tries to find the exact ratio and blend time that suits your taste and your equipment. With the high-quality, clean, bioavailable ingredients in VitaFaze's plant-powered formulas, you are already starting with a superior foundation. Our shakes are designed to dissolve easily, support muscle protein synthesis, and aid in faster recovery, so you can focus on your performance.
Get started with VitaFaze and experience a protein shake that is as smooth as it is effective.
Frequently Asked Questions
Is it better to mix plant protein powder with water or milk?
For the creamiest texture, use a plant-based milk like unsweetened almond or oat milk. The added fats and starches in milk create a richer mouthfeel and help mask any chalky notes. Water produces a thinner, less satisfying shake. If you're counting calories strictly, water is lighter, but for a smooth mix that feels indulgent, plant milk is the better choice.
Should you use a blender or a shaker bottle for plant protein?
A blender is the most reliable tool for a completely smooth mix. It breaks down clumps and emulsifies the powder into the liquid effectively. A shaker bottle with a mixing ball works, but it requires vigorous shaking and may leave some grit, especially with pea or rice proteins. For a quick shake on the go, a shaker is fine; for the smoothest texture, use a blender.
Does the order of ingredients matter when making a protein smoothie?
Yes. Start with the liquid base, then add your protein powder, followed by frozen fruit and other thickeners. This order prevents the powder from getting trapped at the bottom of the blender where it can clump. Mixing the powder with the liquid first ensures it is fully hydrated and dispersed before you add solid ingredients, which leads to a smoother result.
How do you get rid of clumps in plant-based protein powder?
The most effective way is to blend the powder with a small amount of liquid first to form a paste, then add the rest of your liquid. This ensures every particle gets wet. Alternatively, use a blender instead of a shaker bottle. Letting the mixed shake sit for 2 to 3 minutes also allows the powder to hydrate fully, dissolving any remaining clumps.
This article was written using GrandRanker